Sharpening tools is an essential skill that every DIY enthusiast and professional should master. It’s not just about keeping your tools in good condition; it’s about enhancing their performance and extending their lifespan. In this comprehensive guide, we will explore how to sharpen tools, focusing on three primary categories: knives, drill bits, and scissors. Each tool serves a unique purpose, and understanding how to sharpen them properly can lead to more efficient and enjoyable work.
Understanding the Basics of Tool Sharpening
Before diving into the specifics of sharpening knives, drill bits, and scissors, it’s crucial to understand why regular sharpening is necessary. Over time, even the best tools will lose their edge, making tasks more challenging and less efficient. Dull tools can lead to frustration, wasted effort, and even safety hazards. Regular sharpening not only preserves the tools but also enhances the quality of your work.
When it comes to sharpening tools, there are various methods and equipment available. The choice of sharpening method often depends on the type of tool and the desired outcome. Common methods include using whetstones, sharpening guides, electric sharpeners, and grinding wheels. Each of these methods has its advantages and drawbacks, which we will explore in detail as we discuss sharpening specific tools.
Sharpening Knives Effectively
Choosing the Right Sharpening Method
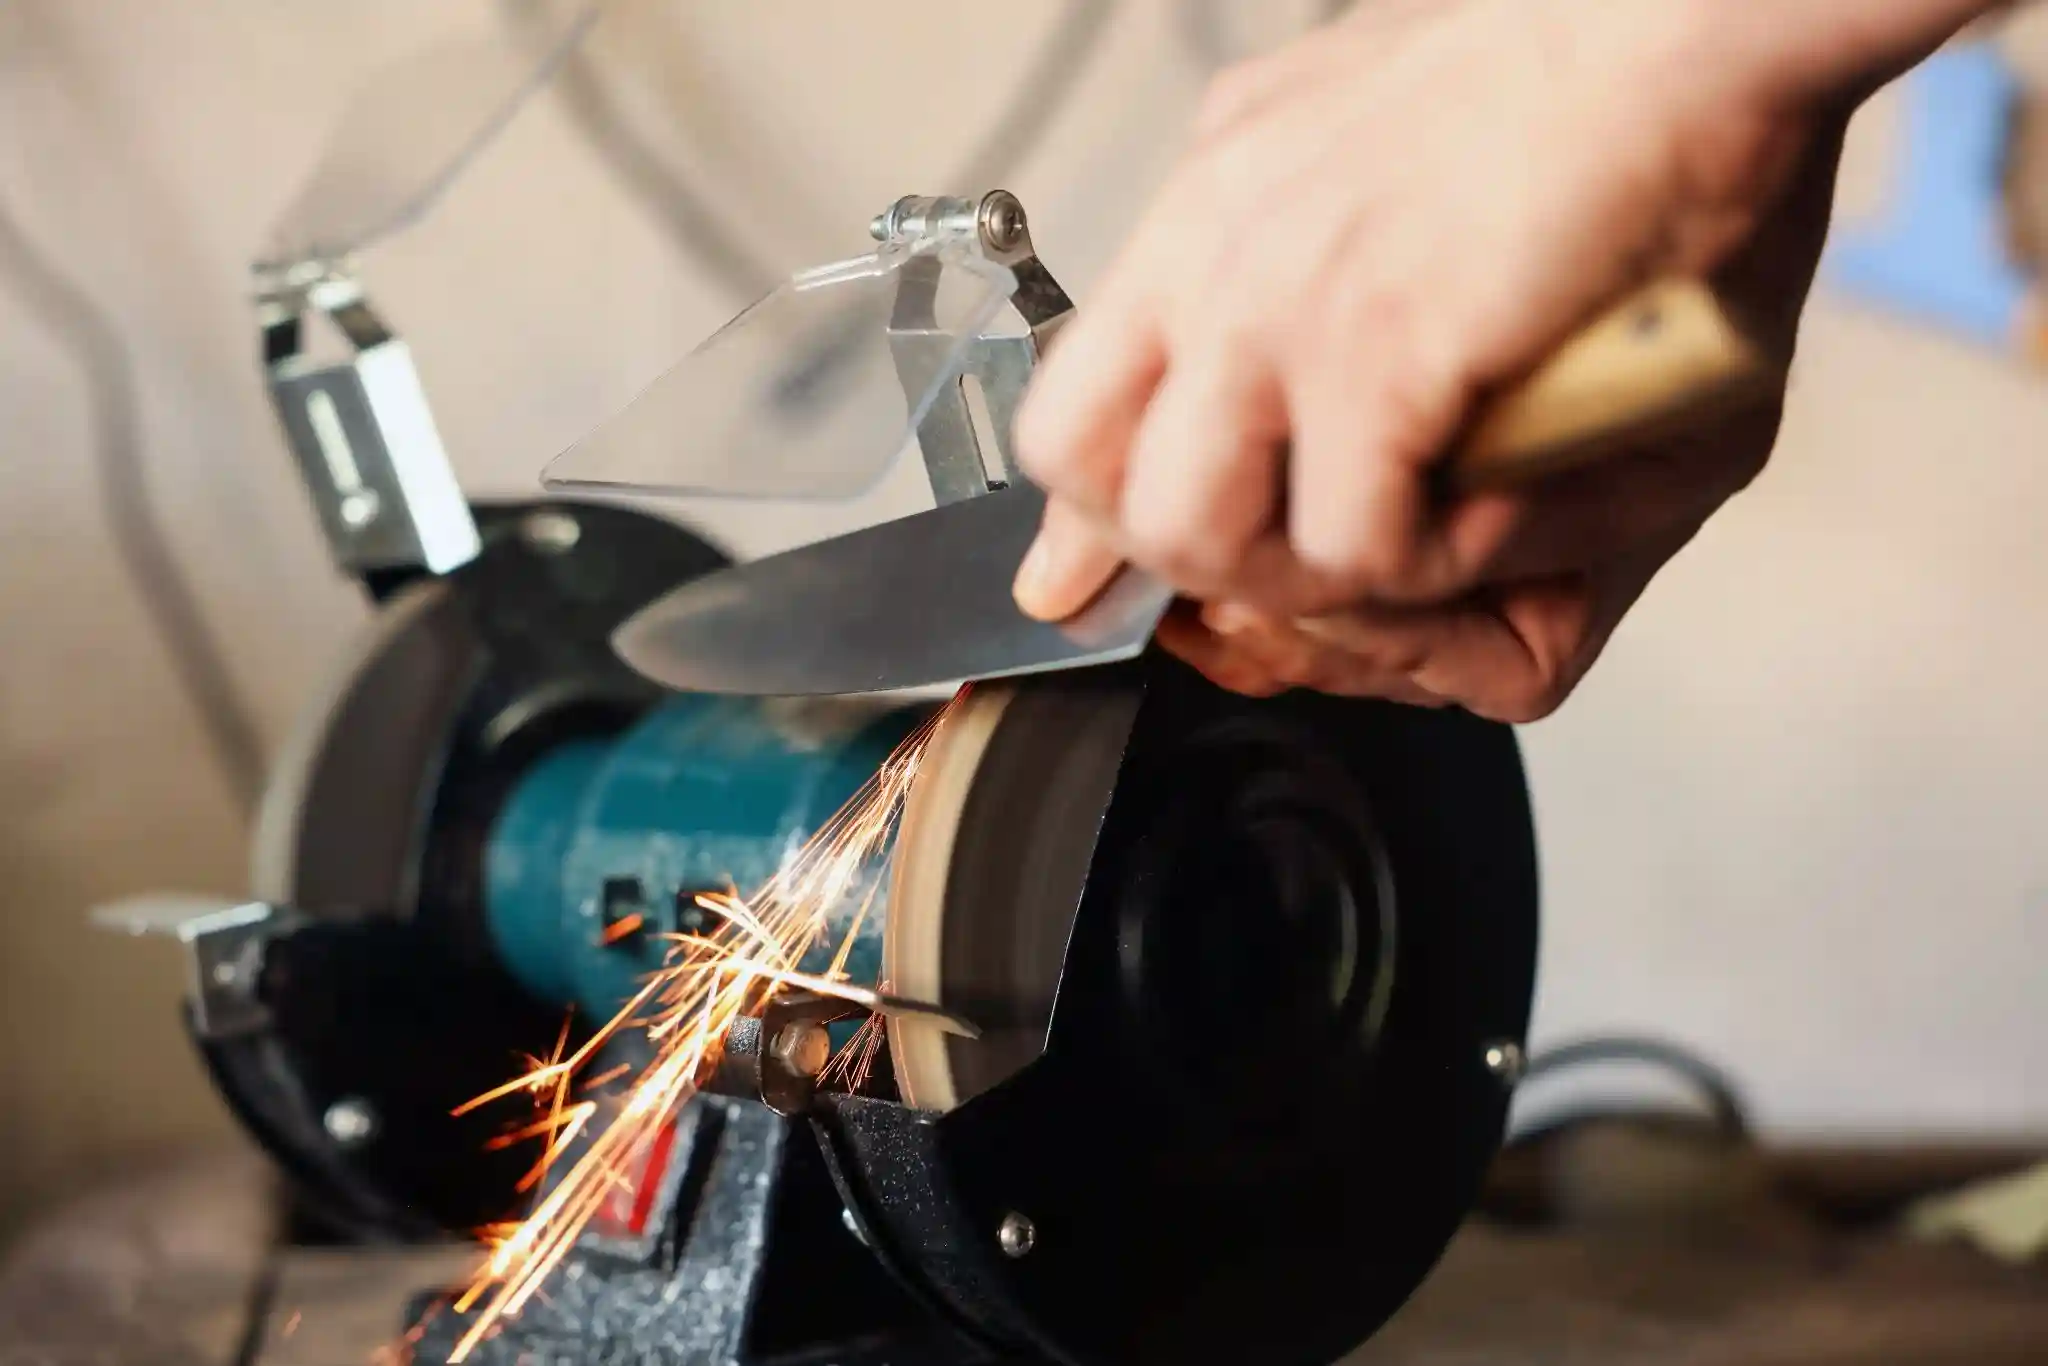
When it comes to knives, the right sharpening method can make all the difference. Popular techniques include using a whetstone, honing steel, and electric sharpeners. A whetstone is a traditional tool that offers precision, allowing you to control the angle and pressure during sharpening. It’s ideal for those who appreciate craftsmanship and want a razor-sharp edge.
On the other hand, electric sharpeners provide convenience and speed, making them suitable for those who may not have the time or skill to use a whetstone. However, they can sometimes remove more material than necessary, potentially shortening the lifespan of the knife. Honing steel is a great tool for maintaining an already sharp knife, aligning the edge and keeping it in top shape between sharpening sessions.
Step-by-Step Knife Sharpening Process
To sharpen a knife using a whetstone, begin by soaking the stone in water for about 10 to 15 minutes. Then, place the stone on a stable surface with a non-slip mat underneath. Hold the knife at a 20-degree angle to the stone. Using gentle pressure, start at the heel of the blade and move toward the tip, sweeping across the stone in a smooth motion. Repeat this process on both sides of the blade, ensuring that you maintain the same angle throughout.
For those using an electric sharpener, follow the manufacturer’s instructions carefully. Typically, you will insert the knife into the designated slot and pull it through several times, allowing the machine to do the work. Always ensure that the knife is clean and dry before sharpening.
Maintaining Your Knife Post-Sharpening
After sharpening, it’s essential to maintain your knife to keep it in peak condition. Regularly clean the blade with warm, soapy water and dry it immediately to prevent rust. Store knives in a block, magnetic strip, or sheath to protect the blade from damage. Avoid tossing them in a drawer with other utensils, as this can dull the edge.
In addition, regular honing with honing steel will keep the knife’s edge aligned. This practice can prolong the time between sharpening sessions, allowing you to enjoy a sharp knife longer.
Proper Techniques for Sharpening Drill Bits
Recognizing When Drill Bits Need Sharpening
Dull drill bits can significantly impact your work, leading to poor performance and increased risk of injury. Recognizing when your drill bits need sharpening is key. Signs of dull bits include difficulty drilling through materials, excessive heat generation, and visible wear on the bit edges. If you find yourself applying more pressure than usual or if the drill bit is not creating clean holes, it’s time for sharpening.
The Sharpening Process for Different Types of Drill Bits
Sharpening drill bits requires attention to detail and the right technique. For twist drill bits, a bench grinder is often the best choice. Start by setting the grinder to a moderate speed. Hold the drill bit at the correct angle, typically around 60 degrees, against the grinding wheel. Rotate the bit as you grind to maintain an even edge on both sides.
Specialty bits, such as spade or masonry bits, require different techniques. For spade bits, sharpen the cutting edges using a file, ensuring that you maintain the original shape. For masonry bits, a diamond sharpening tool is recommended, as it can handle the harder material.
Preventative Care for Drill Bits
To prolong the life of your drill bits, proper care is essential. After each use, clean the bits to remove debris and build-up. Store them in a protective case to prevent damage. Using the correct speed and pressure while drilling can also help maintain sharpness. For instance, using a slower speed for harder materials can reduce wear on the bit.
Sharpening Scissors Like a Pro
Identifying Dull Scissors
Dull scissors can be a real hindrance, affecting precision and ease of cutting. Identifying when your scissors are dull is straightforward. If they struggle to cut through paper or fabric, or if you notice frayed edges on your cuts, it’s time to sharpen them. Dull scissors can also lead to hand fatigue, as more pressure is required to achieve clean cuts.
Methods for Sharpening Scissors
Several methods exist for sharpening scissors, each with its benefits. One of the most effective tools is a sharpening stone. Begin by cleaning the scissors thoroughly. Open the scissors and place the blade against the sharpening stone at a 10 to 15-degree angle. Gently slide the blade along the stone, applying light pressure. Repeat this process several times on both blades.
Alternatively, specialized scissors sharpeners are available that can simplify the process. These devices are designed to align the blades perfectly and provide a consistent sharpening angle, making it easier for beginners.
Maintaining Scissors After Sharpening
To ensure your scissors remain effective after sharpening, regular maintenance is key. Clean the blades frequently to prevent build-up from materials. Lubricate the pivot point with a few drops of oil to keep the mechanism smooth. Proper storage is also important; consider using a protective case to prevent damage when not in use.
Safety and Best Practices for Tool Sharpening
When sharpening tools, safety should always be a priority. Use protective eyewear to shield your eyes from metal filings and debris. Ensure that your workspace is well-lit and organized to avoid accidents. For power tools, follow the manufacturer’s guidelines carefully and never attempt to sharpen tools you are unfamiliar with.
Additionally, always keep your hands clear of moving parts and avoid wearing loose clothing that could get caught in machinery. Taking these precautions will help you sharpen your tools safely and effectively.
Conclusion
Mastering the art of tool sharpening is not just a skill; it is an essential practice for anyone who genuinely values the performance and longevity of their tools. Whether you are a seasoned professional tradesperson working on intricate projects day in and day out or a weekend DIY warrior tackling home improvement tasks, understanding how to properly sharpen tools like knives, drill bits, and scissors can profoundly enhance your efficiency and enjoyment in your work.
When your tools are sharp, they perform better. A well-sharpened knife slices through materials with ease, a drill bit penetrates surfaces smoothly and cleanly, and scissors cut through fabric or paper without tearing. This level of effectiveness can significantly reduce the time and effort you expend on a project, allowing you to focus on the creative side of your work rather than battling against dull edges and ineffective tools. Imagine how much more enjoyable your tasks become when you can work swiftly and effectively, feeling the satisfaction that comes from using tools that are in prime condition.
By adopting proper sharpening techniques, you not only improve the performance of your tools but also ensure their longevity. Regular maintenance is key; when you take the time to sharpen and care for your tools, you extend their lifespan and save money in the long run. Investing a little time in sharpening can prevent the need for costly replacements, and it fosters a deeper connection and respect for the tools you use. Each sharpened tool becomes an extension of your skill, a testament to your dedication and craftsmanship.
Moreover, practicing safety during the sharpening process is paramount. Understanding how to handle tools correctly, using appropriate protective gear, and following best practices can prevent accidents and injuries. By cultivating a safe sharpening environment, you can work with confidence, knowing that you are minimizing risks while maximizing the effectiveness of your tools.
FAQs
How often should I sharpen my tools?
The frequency of sharpening depends on usage. Regularly assess your tools, sharpening them when you notice a decline in performance.
Can I sharpen all types of knives with a whetstone?
Yes, a whetstone is versatile and can sharpen most types of knives, including kitchen, pocket, and hunting knives.
What is the best way to store sharp tools?
Store sharp tools in a dedicated space, such as a tool block or magnetic strip, to protect the edges from damage.
Is it safe to use an electric sharpener?
Yes, electric sharpeners are safe if used according to the manufacturer’s instructions. Always keep hands and clothing clear from moving parts.
How do I know if my drill bit is dull?
Signs of a dull drill bit include difficulty drilling, excessive heat, and visible wear. If you find yourself applying extra pressure, it’s likely time to sharpen.